Image-to-3D Workflow
To create an image-to-3D generation workflow you will need 2 or 3 nodes depending on your assets. If you already have images that you have generated or designed, then you won't need an image generation node.
- Image Generation Node
- Image Preview Node
- 3D Generation Node
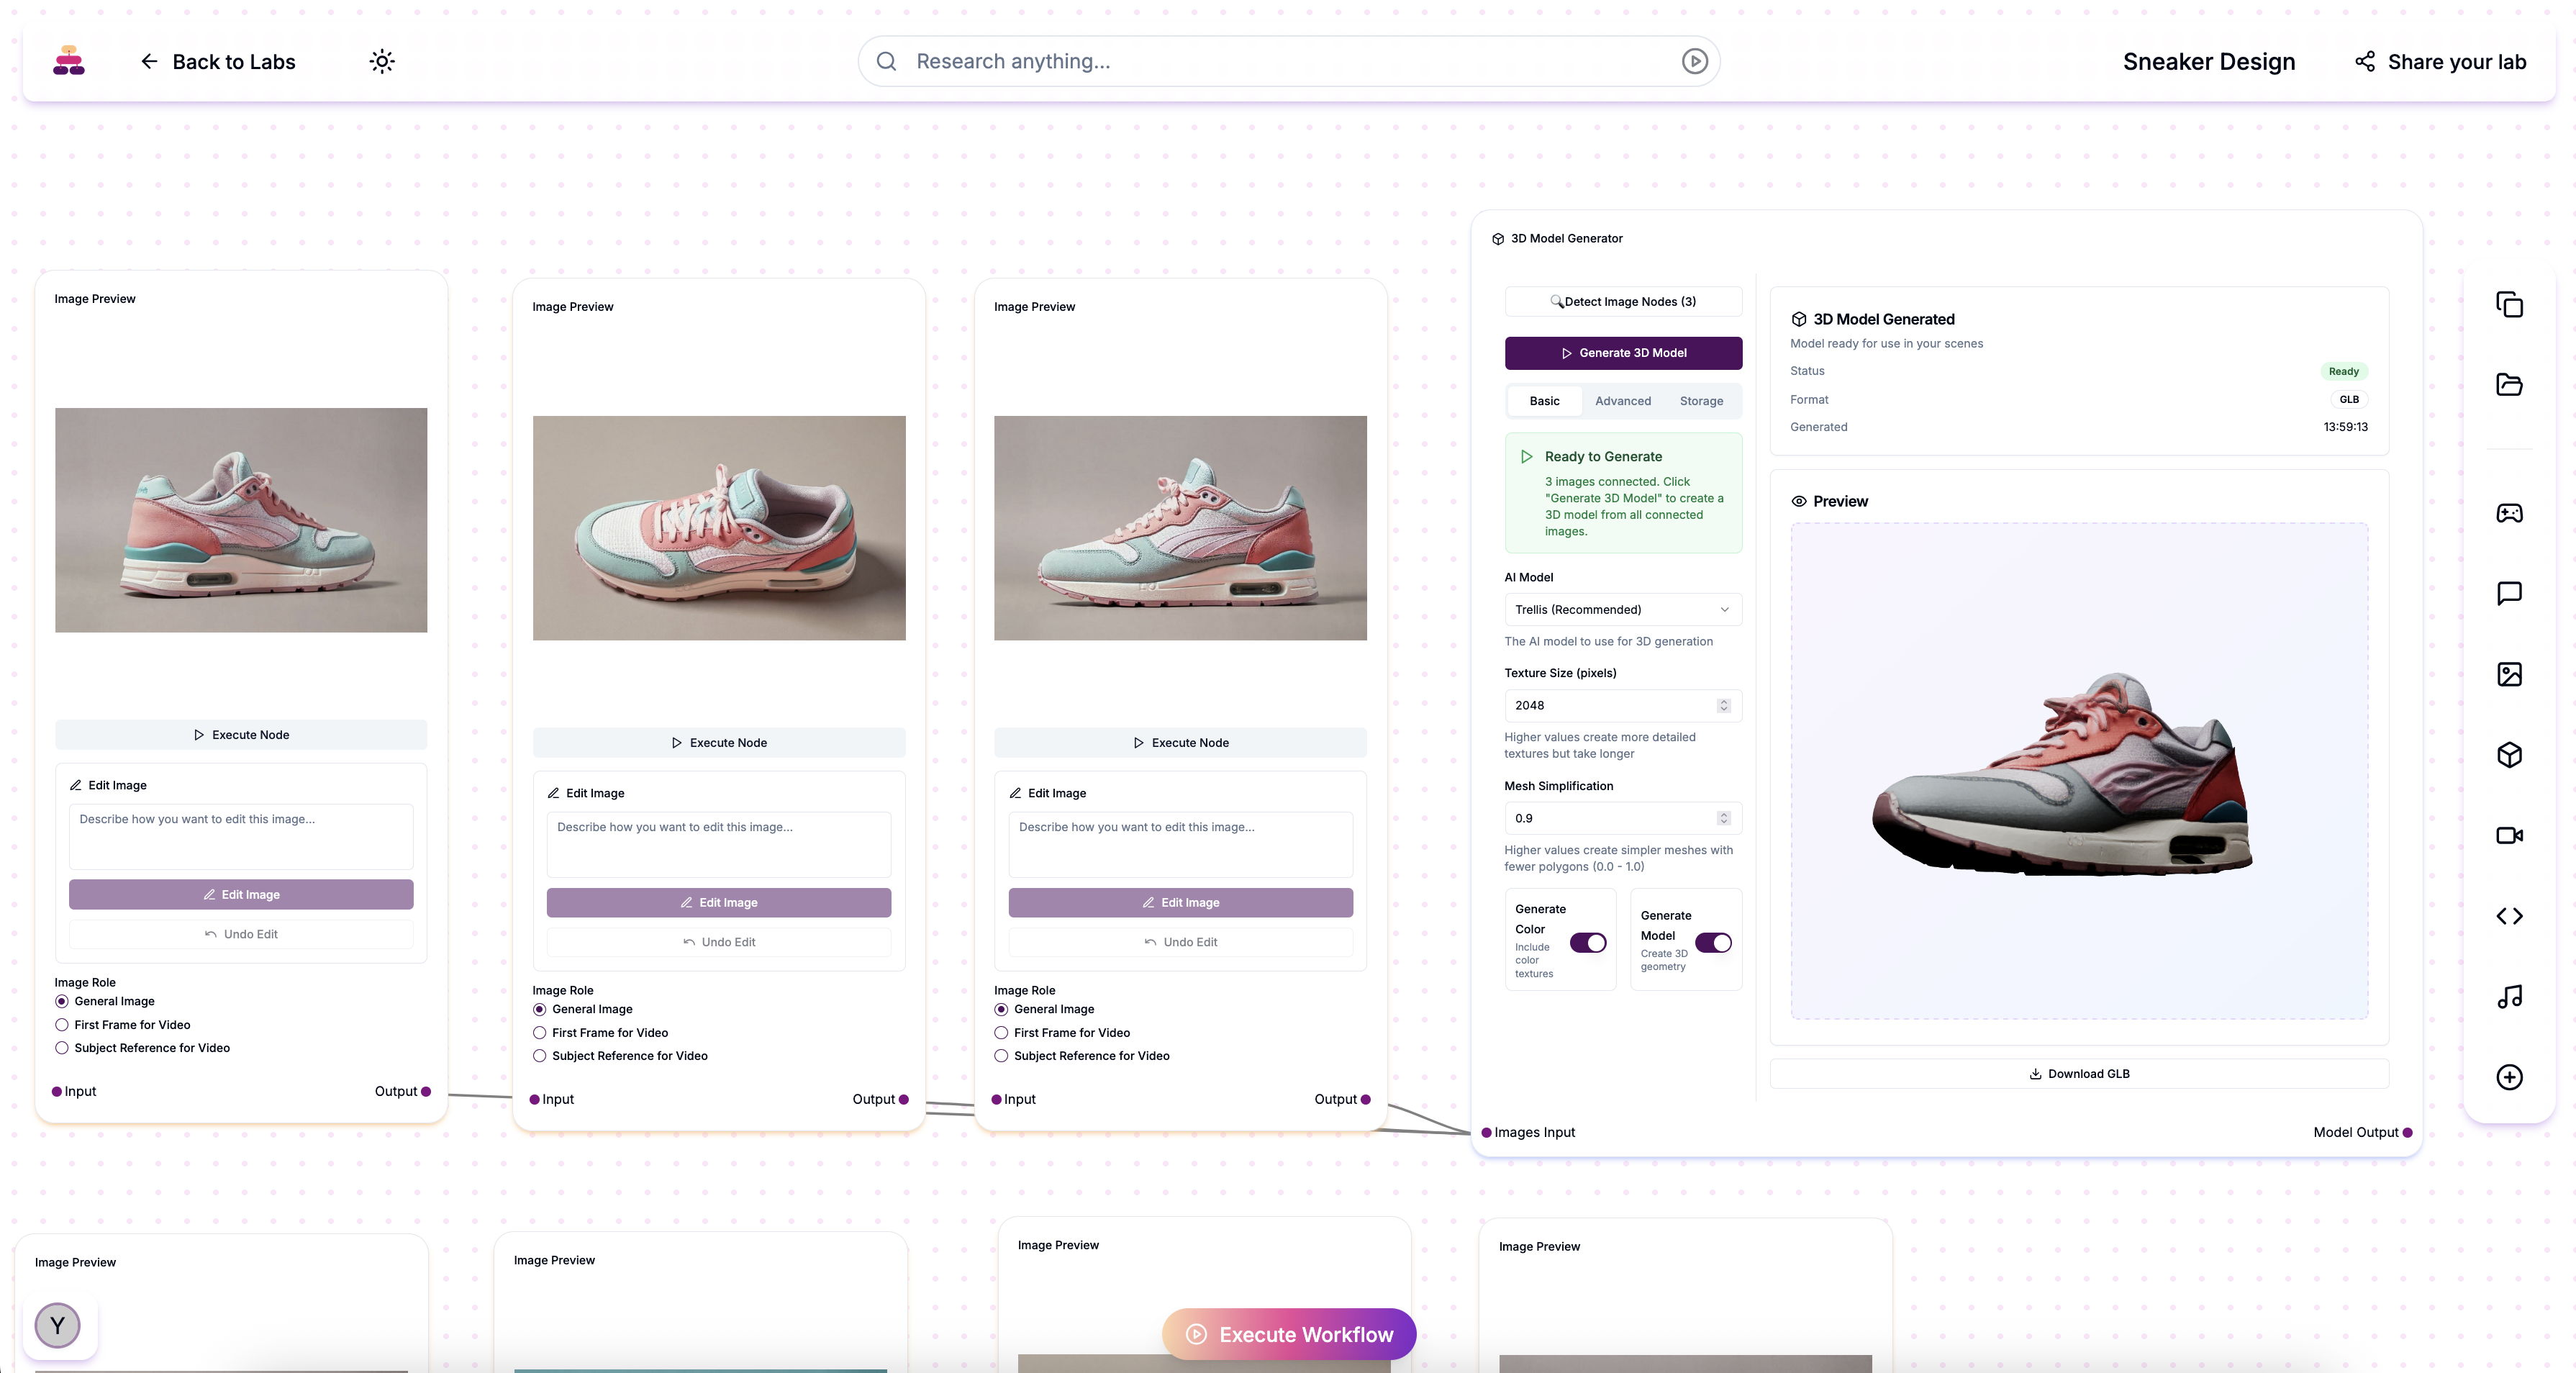
Image Generation
Refer to the Image Generation Node for more details on how to configure your image generation for the best quality. If you are starting from scratch. You will need an image generation node to create the 3 images needed to create a 3D model
Image Preview Node
Either use the images generated from your image gen node or upload new assets from your computer or your lab assets. Set your your Image Preview Node to "General Image" use to use the image to your 3D generation.
3D generation Node
Step 1
Connect all 3 image preview nodes to the "Image Input" port of the 3D geneartion.
Step 2
Once connected, make sure you click the "Detect Image Nodes" button on your 3D Generation Node. This will detect the amount of image preveiw nodes you are using to generate your model.
Step 3
Now you can edit your settings to optimise your generation. When you are finished, click the "Generate 3D Model" button to generate your model.